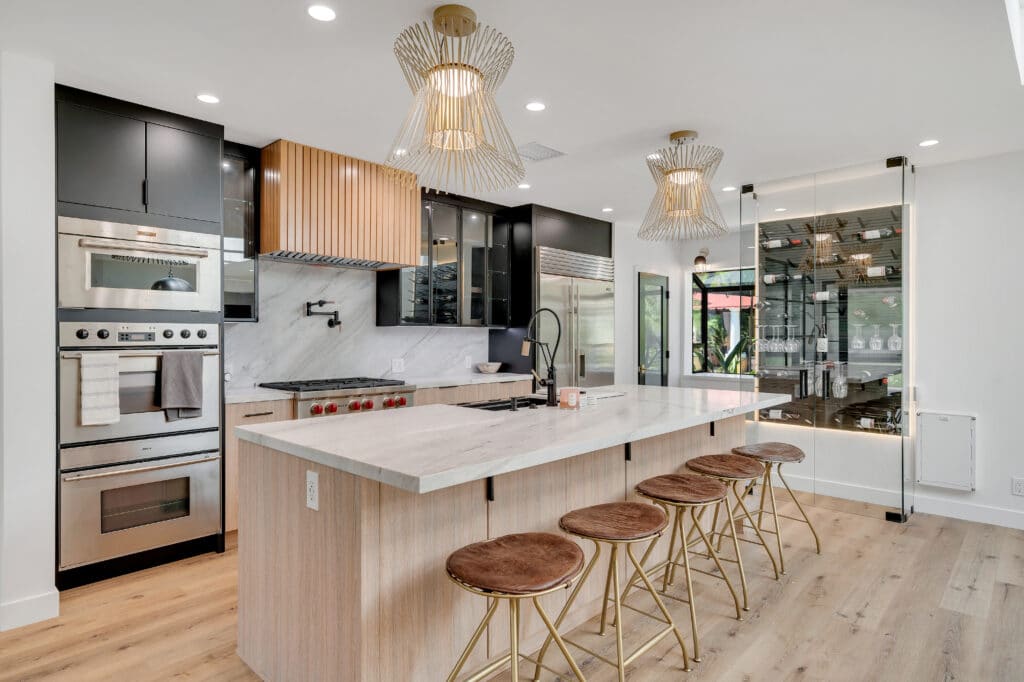
So, you’re diving into the world of kitchen remodeling—a thrilling yet complex endeavor where every decision impacts functionality, aesthetics, and your sanity. Whether you’re planning a streamlined remodeling process for a small kitchen area or a complete overhaul of your entire kitchen, the secret lies in nailing the sequence of tasks. Let’s cut through the noise with a mix of technical know-how and hard-won wisdom.
Step 1: Define Your Goals (Before You Swing a Sledgehammer)
Deciding what you want to achieve with the remodel is the cornerstone of success. Are you modernizing outdated kitchen plumbing, expanding kitchen space, or swapping old appliances for new appliances with smart features?
Key Questions to Ask:
- Functional needs: Do you cook daily, host often, or need kid-friendly zones?
- Layout pain points: Is your galley kitchen too narrow? Does the big kitchen island block traffic flow?
- Aesthetic vision: Are you craving sleek modern wood floors or warm hardwood flooring?
Pro tip: Create a mood board with finishes, cabinet door styles, and appliance models. Apps like Pinterest or Houzz streamline this process.
Step 2: Budgeting—The Unavoidable Reality Check
Kitchen remodels range from 15,000fora∗∗partialkitchenremodel∗∗(refacingcabinets,newcountertop)to15,000fora∗∗partialkitchenremodel∗∗(refacingcabinets,newcountertop)to75,000+ for a full remodel with custom cabinetry and built-in fridges.
Budget Allocation Breakdown:
- Cabinets: 25–35% (stock, semi-custom, or custom options)
- Appliances: 15–20% (prioritize ENERGY STAR-rated efficient appliances)
- Labor: 20–25% (plumbers, electricians, carpenters)
- Flooring: 10–15% (hardwood floor averages 6–6–12/sq. ft. installed)
- Contingency: 15% for surprises (e.g., rotting subfloors, outdated kitchen plumbing)
FYI: Reusing existing cabinet boxes with new doors or roll-out flooring inserts can slash costs by 30%.
Step 3: Design the Layout Like an Architect
Your kitchen design must balance form and function. Here’s how to optimize kitchen space:
Technical Layout Guidelines:
- Work Triangle: The distance between the refrigerator, stove, and kitchen sink should total 13–26 feet.
- Clearance Standards:
- 42” between cabinets in a galley kitchen.
- 36” of walkway around islands.
- 15” of countertop beside the oven for hot dishes.
- Electrical Planning:
- Dedicate 20-amp circuits for appliances like the dishwasher and microwave.
- Install outlets every 4 feet along counters (National Electrical Code requirement).
For small kitchens, consider Ikea organization cabinets with pull-out shelves or vertical storage.
Step 4: Hire Professionals Strategically
Kitchen remodels often require permits, especially for kitchen plumbing or electrical updates.
When to Hire Renovation Experts:
- Plumbers: Relocating gas lines for a chef’s stove or installing a new dishwasher requires licensed pros.
- Electricians: Upgrading to 240V for induction cooktops or adding under-cabinet lighting.
- Flooring Specialists: Ensuring hardwood flooring is acclimated (48–72 hours onsite) and installed with proper expansion gaps.
DIY Opportunities:
- Cabinet painting: Use adhesion primer (e.g., BIN Shellac) for laminate surfaces.
- Backsplash installation: Opt for peel-and-stick tiles if mortar intimidates you.
Step 5: Demolition—The Controlled Chaos Phase
Before ripping out old appliances and cabinet doors, follow these protocols:
- Shut Off Utilities:
- Water: Locate the main valve; drain pipes to avoid spills.
- Gas: Contact your provider to cap lines if removing a gas stove.
- Electricity: Turn off circuits at the breaker panel.
- Hazard Mitigation:
- Test for asbestos in flooring/adhesive (common in pre-1980 homes).
- Use a HEPA-filter vacuum to contain dust.
- Salvageables: Donate usable old appliances or recycle metal components.
Step 6: Rough-In Work—The Behind-the-Scenes Hero
This phase sets the stage for your new kitchen’s infrastructure:
- Plumbing Rough-In:
- Replace corroded pipes with PEX or copper.
- Install shut-off valves under the kitchen sink for easy maintenance.
- Venting: Ensure proper air admittance valves (AAVs) to prevent sewer gases.
- Electrical Rough-In:
- Run wiring for new appliances (e.g., 50-amp circuit for dual ovens).
- Position outlets 18” above finished floor (ADA recommendation).
- HVAC Updates:
- Extend ductwork for range hoods (minimum 400 CFM for gas stoves).
Step 7: Flooring Installation—The Foundation of Your Design
Flooring choices impact durability and aesthetics:
- Hardwood Flooring:
- Pros: Timeless, refinishable.
- Cons: Susceptible to water damage; avoid near dishwashers.
- Installation: Nail-down over plywood subfloor; leave ¾” expansion gaps.
- Luxury Vinyl Plank (LVP):
- Waterproof, scratch-resistant, and DIY-friendly with click-lock systems.
- Tile:
- Use uncoupling membranes (e.g., Schluter Ditra) to prevent cracks.
Install floors before cabinets to ensure a level base and avoid awkward transitions.
Step 8: Cabinets and Countertops—The Workhorse Duo
Cabinetry Installation:
- Stock Cabinets: Pre-assembled; install with shims and 3” screws into studs.
- Custom Cabinets: Built to fit odd angles or tall ceilings; allow 8–12 weeks for fabrication.
- Ikea Organization Cabinets: Maximize space with pull-out trash bins or spice racks.
Countertop Considerations:
- Quartz: Non-porous, low-maintenance (ideal for messy cooks).
- Butcher Block: Requires monthly oiling; avoid near sinks.
- Seams: Position seams away from high-use areas (e.g., near the stove).
Step 9: Appliances and Fixtures—The Grand Finale
Installing new appliances requires precision:
- Dishwasher: Level using adjustable legs; connect to a dedicated 15-amp circuit.
- Refrigerator: Allow ½” clearance at sides for ventilation (critical for built-in fridges).
- Range Hood: Ducted models vent outdoors; ductless recirculate air through charcoal filters.
Pro Tip: Test all plumbing fixtures post-installation. Check for leaks under the kitchen sink and ensure the dishwasher drains properly.
Step 10: The Details That Make It “Yours”
- Lighting: Layer ambient (recessed), task (pendants), and accent (LED strips) lighting.
- Backsplash: Use epoxy grout in high-splash zones—it’s stain-resistant.
- Hardware: Soft-close hinges prevent cabinet doors from slamming.
Final Word: Embrace the Remodeling Process
When remodeling a kitchen, patience and planning trump haste. Whether you’re reviving an old kitchen with a new countertop or building a new dream kitchen from scratch, remember: The entire kitchen needs to work as a cohesive system. Stick to the sequence, lean on renovation experts for technical tasks, and celebrate each milestone.
Now, grab that tape measure, channel your inner contractor, and transform your kitchen space into a hub of efficiency and style. Happy remodeling!


