Let’s be real: removing wallpaper is about as fun as untangling Christmas lights. You start optimistic, but five minutes in, you’re questioning every life choice that led you here. But hey, whether you’re prepping for a bathroom remodel or just tired of staring at floral patterns from the ‘80s, we’ve got your back. At America Green Builders, we’ve seen it all—from Santa Clarita garage conversions to Mission Hills room additions—and we’re sharing our hard-earned wisdom to make this process almost enjoyable.
Step 1: Prep Like a Pro (Because Chaos Isn’t Cute)
First things first: clear the room. Move furniture, roll up rugs, and cover floors with drop cloths. Trust us, you don’t want adhesive goop on your grandma’s heirloom sofa. Pro tip? Label your tools. Nothing kills momentum like hunting for a scraper under a pile of wallpaper scraps.
What you’ll need:
- Scoring tool (the MVP of this operation)
- Spray bottle or garden sprayer (water is your new best friend)
- Plastic scraper (metal scratches walls—don’t be that person)
- Wallpaper removal solution (or DIY mix: hot water + fabric softener)
- Patience (sold separately, unfortunately)
FYI, if you’re already sweating bullets thinking about the cost of fixing botched walls, maybe call a general contractor near me like us. We’ve got reviews that’ll make you swoon.
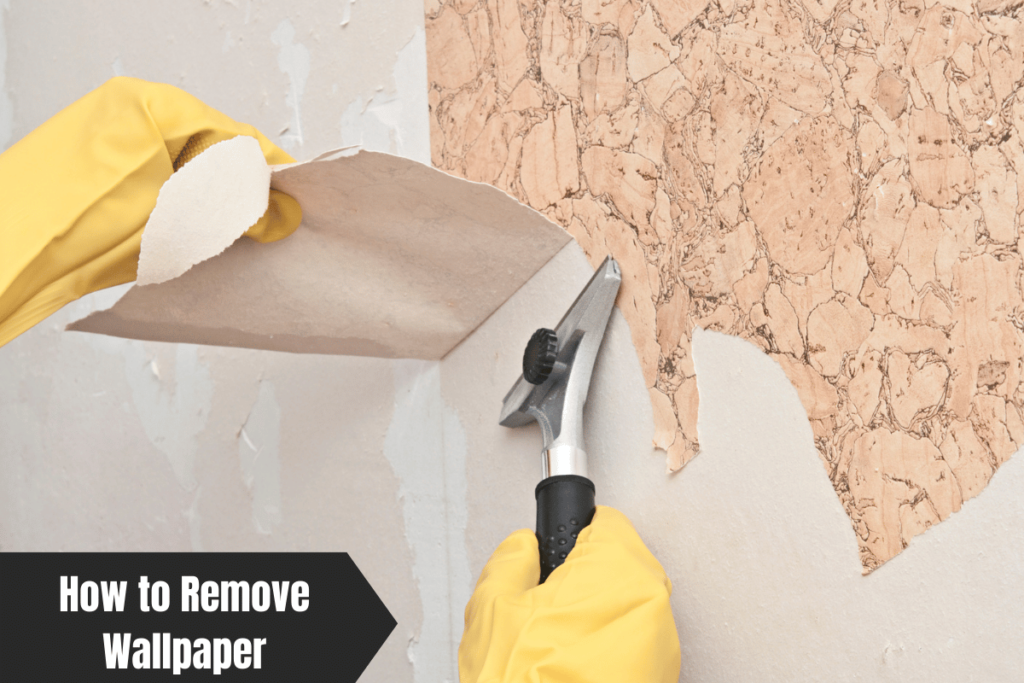
Step 2: Attack the Wallpaper Like It Owes You Money
Score the walls: Crank up some music and go to town with your scoring tool. This isn’t a gentle massage—press firmly to create tiny holes so the solution can penetrate. Miss a spot? Congrats, you’ll be scraping for hours.
Soak it up: Spray the solution liberally. Let it sit for 10–15 minutes. If your wallpaper laughs in your face (looking at you, vinyl-backed types), repeat until it surrenders.
Scrape with gusto: Start at a seam and push the scraper downward. Work in small sections to avoid drying glue. If chunks cling like a bad ex, reapply solution and try again.
Step 3: Clean Up & Celebrate (Or Cry, We Won’t Judge)
Once the wallpaper’s gone, wash the walls with warm water and mild detergent. Check for leftover adhesive—nobody wants lumpy paint. Let walls dry completely before priming or painting.
Hot take: If you’re already daydreaming about a kitchen remodel or outdoor living space, let’s chat. America Green Builders handles everything from home improvement services in Los Angeles to building contractor projects in Santa Clarita. We’ll even bring the coffee.
“But What If…” Common Wallpaper Disasters (And How to Fix Them)
Problem 1: The Wallpaper Won’t Budge
Maybe it’s been up since the Nixon administration. Use a steamer (rent one or buy cheap) to soften stubborn adhesive. Still stuck? Call a pro. Your time has value—unless you enjoy self-punishment.
Problem 2: The Drywall Is Coming Off With the Paper
Oops. Now you’re staring at crumbly drywall. Patch small holes with joint compound, but if it looks like Swiss cheese, hire a construction company to redo the walls. We’ve rescued plenty of DIY warriors in Mission Hills this way.
Problem 3: The Glue Won’t Die
Mix equal parts water and white vinegar, scrub with a sponge, then rinse. Still sticky? Sand lightly and prime with oil-based primer before painting.
Tools & Supplies Cheat Sheet
| Tool | Why You Need It |
|---|---|
| Scoring Tool | Lets solution penetrate adhesive |
| Steamer | For vinyl or “indestructible” wallpaper |
| Plastic Scraper | Saves your walls (and sanity) |
| Fabric Softener Mix | Cheap, effective, and smells like spring |
When to Call the Pros (No Shame in This Game)
Look, we get it. You’re a warrior. But if you’re short on time, tackling a tricky texture, or planning a bigger project (like a room addition or bathroom remodel), let America Green Builders step in. We’re local home contractors with a rep for making nightmares vanish. Plus, our price estimates won’t make you faint.
FAQs: Because Google Can’t Hold Your Hand
Q: How long does wallpaper removal take?
A: Depends on the room size and wallpaper type. A small bathroom? Maybe 4–6 hours. A dining room with three layers? Pack snacks.
Q: Can I paint over wallpaper instead?
A: IMO, don’t. Paint peels, bubbles, and reveals seams. Strip it first—your future self will thank you.
Q: What’s the average cost to hire a pro?
A: Between $2–$4 per sq. ft. But hey, we’re biased—ask us for a quote 🙂
Final Thoughts: You’ve Got This! (Or We Do…)
Removing wallpaper is equal parts therapy and torture. But once it’s done, you’re free to create a space you love—or hand the reins to a Los Angeles construction company like ours. Whether it’s a garage conversion, kitchen remodel, or full home improvement overhaul, America Green Builders is here to turn “Ugh, why?!” into “Wow, how?!”
Ready to ditch the DIY drama? Contact us today. We promise zero floral patterns and maximum high-fives.
